Many coffee lovers may struggle with this task – how to clean Keurig?
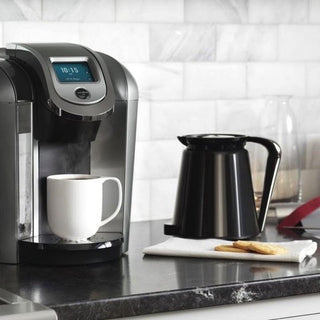
The Keurig has become a common device in homes and offices because of its convenience. There’s nothing like popping a K-Cup in and getting an instant cup of hot, fresh coffee. However, there are times when a Keurig isn’t so convenient — specifically when it starts getting clogged up with grime and scale, and then refuses to work properly.
Scale, in particular, can be frustrating. Water, primarily hard water, has a certain amount of trace minerals floating around in it. These mineral particles tend to react to high temperatures, which force them out of their harmless state and make them bond to nearby surfaces. As this happens over and over, a limestone-like layer, called scale, builds up. It means trouble for your Keurig, because it decreases water flow, makes it impossible to properly measure a cup, and can eventually block up your Keurig completely.
How to descale a Keurig?
To get rid of scale, avoid nasty odors and mold, and make sure that your Keurig is functioning as flawlessly as possible, it’s important to clean it out. We’ll show you the best way to clean out the Keurig coffee maker, where to start, and what materials to use.
How To Clean a Keurig Coffee Maker
1. Wash and Wipe the Reservoir and Other Removable Parts
Start by unplugging the Keurig; you don’t want to damage the electronics or risk electrocution.
Then remove all the components that you can, including the water reservoir, the mug stand/drip tray, and the K-Cup pod holder inside the coffee maker.
Carry them all over to the kitchen sink and give them a thorough wash with soapy water, just like they were ordinary dishes. Set them aside to air dry while you work on other components.
This is also a great time to take a washcloth or a wet paper towel and give the whole Keurig a good wipe-down. The coffee machine, especially in busy settings, can collect a lot of dust over time. You don’t want any of that dust mixing with your freshwater or coffee when you’re finished here, so it’s a good idea to give the surface a general cleaning.
2. Clean All the Crevices

Acquire a small cleaning brush (a toothbrush works well here), and a pin or paper clip. It’s time to give your Keurig a more detailed cleaning for the remaining components. While this may seem like an unnecessary step, it’s very important to ensure the purity of your water and the quality of coffee you get from your machine. Over time, grim and grit can build up in the crevices of your Keurig, causing clogs and affecting taste. Get rid of this detritus to improve durability and performance.
Start by cleaning all around the K-Cup location, where the K-Cup holder is placed. Different Keurig models have slightly different insert methods, but the basics are the same.
Use the brush to clean around the holder and the deep nooks in this part of the Keurig. Get rid of all grit and lost coffee grounds. A flashlight or good overhead lighting is helpful here. A nearby bowl of water or cloth can help, but try to avoid using soapy water for this stage — that dish soap may prove difficult to get out, and you don’t want it tainting your coffee.
When that is finished, get out your pin/paperclip and examine those toothy components that poke into the K-Cups. There should be a small hole in each “tooth” for the hot water/coffee to pass through.
Poke your pin through that hole and wiggle it around to loosen any caked-on debris and help remove any blockages. If your Keurig has been running slowly, it could be a clog in one of these holes that is causing it.
3. Run Through With Vinegar
Many Keurig components are inside the coffeemaker, well out of your reach. Fortunately, there’s an easier way to conduct an internal cleaning than dismantling the whole machine: Common kitchen vinegar is acidic enough to remove scale build-up but harmless to the rest of the Keurig.
So, how to clean Keurig coffee maker from the inside?
Take the water reservoir and fill it with a vinegar solution – half white vinegar and half fresh water. Lock it back into the Keurig base, put all the other components back in place, and get a mug handy: It’s time to make some hot vinegar.
Run the Keurig on normal brew cycle settings and keep filling mugs with the vinegar mixture until it is completely gone. This is going to stink a little, but as we said, it’s not harmful for your Keurig, and it will help remove that scale. It’s possible that a clog will form during this descaling process. If it does, open up the top and use your pin again to poke the holes and see if you can dislodge any particles that may have become trapped.
For a full cleaning, it’s a good idea to run two full reservoirs of half vinegar, half water. If your Keurig is still in good shape or you don’t have much time, a single full reservoir can work just fine. If you have any issues with the descaling process, see our guide to follow the steps for your exact Keurig.
Note: Angelino's does sell a descaling solution of its own, if you really want a brand-name product to work with. White vinegar, however, is cheaper and easier to find. But, the Angelino's descaling solution uses citric acid as its active ingredient, which can work better on tough build up.
4. Wash Out the Vinegar With Water

You don’t want that vinegar to stay in the Keurig, so fill the reservoir back up with freshwater and run through a full container again to flush out all the vinegar. Make sure it passes the smell test when it’s done.
Once this is finished, your Keurig performance should be much improved, and scale problems should have literally dissipated.
Pro tip: You should clean the water reservoir at least once a week. You can use soapy water and a cloth to quickly remove superficial mineral buildup. If your Keurig coffee maker has a water filter, make sure to replace it every two months.
How Do I Clean My Keurig Without Vinegar or Descaling Solution?
Cleaning Keurig with vinegar is easy and effective, but what if you don’t want to risk the lingering smell and taste?
If you don't want to use a vinegar-based descaling solution on your Keurig machine, the easiest way to achieve similar results is by reaching for another popular cleaning agent – baking soda.
Dissolve one-quarter cup of baking soda in enough water to fill up the water tank. Then proceed as described in the tutorial above -- run the coffee maker through one or two brew cycles. At the end, remove the dirty water and rinse the reservoir under fresh water.
You may also use lemon juice and water instead. Prepare a 1:1 lemon juice and water mixture and follow the same steps. Remember to acquire enough lemon juice to fill out the reservoir to a half.
Using baking soda or lemon juice can save you from the lingering vinegar taste in your coffee, and the results are often as good as if you'd use a vinegar solution.
How To Clean a Keurig Coffee Maker – Final Thoughts
It’s a good idea to clean your Keurig coffee maker regularly, every several months, especially if your Keurig sees a lot of action. Remember that hard water is more likely to cause problems than soft water. If you have scale issues, you may want to stay away from tap water and use distilled water or bottled water instead.
Did these steps work for you? We would love to hear about your experience! @AngelinosCoffee or Facebook
Source: Lacoma, Tyler. "Remove Dirt and Scale from Your Keurig in Just a Few Steps." Digital Trends.

